To answer some of the frequently asked questions about the fall training, I figured I'd…

How to automate posting from WordPress to Facebook
One of the golden rules we use in coding and web design is D.R.Y. It stands for Don’t Repeat Yourself. It’s something that’s a pretty good rule in a lot of other work, too.
So today, I’m going to show you how to cut out one piece of work that you may find yourself repeating. That’s posting to your WordPress site, and then posting the same thing to Facebook.
Let’s say you want to notify the public about the agenda for your next upcoming board meeting. It’s important to put the notice and the agenda on your site, because that’s the official place for such things. But you also know that a lot of the public uses Facebook regularly, and they’re more likely to see the notice if it’s in their newsfeed, as opposed to when they have to actively visit your website to find it.
The text of your notice on both your website and Facebook is likely to be the same. But between logging in, finding the spot to post, copy and paste, and the slow internet connection in between, these two simple tasks could easily eat up a solid chunk of time.
So what to do? Well, put the magic of the internet to work, and have it do the job for you! Today I’ll show you how to use a free service called Zapier to automatically check your website, and post anything new it finds to your Facebook page.
Step 1: Sign up for an account

The first step in this process is pretty obvious. You’re going to need a Zapier account. So head to https://zapier.com/. There’s a big orange button on the top right that says “Sign up”. You’ll want to click that. If you have a Google account, you should use that, because that will allow you to use the same account for both.
Once you’ve signed up, Zapier will guide you through some steps to get your account running. It will ask you to select the apps that you use regularly. See the photo to the right for an example of the apps I selected. This will help Zapier recommend automations for you.
Step 2: Create a Zap
A zap is the magic of Zapier. You set a “trigger” that you ask Zapier to keep an eye out for. Every 15 minutes or so, the service will scan the internet to see if your trigger has happened. If it catches a trigger, then it will perform the steps that you’ve asked it to do.
In this case, our trigger will be a new post on your WordPress website.

In the box that says “What do you want to Automate Today?”, find where it says “Connect this app…”. Type in “WordPress”. Select that. In the next box, type in Facebook and select “Facebook Pages”.
Now you’ll have a couple more boxes open up. Where it says “When this happens…” select “New Post” with the WordPress icon. And in “then do this!” select “Create Page Post” with the Facebook icon.

Now hit the “Make a Zap!” button.
Step 3: Connect your WordPress account
Now we’re getting into the juice of the Zap.
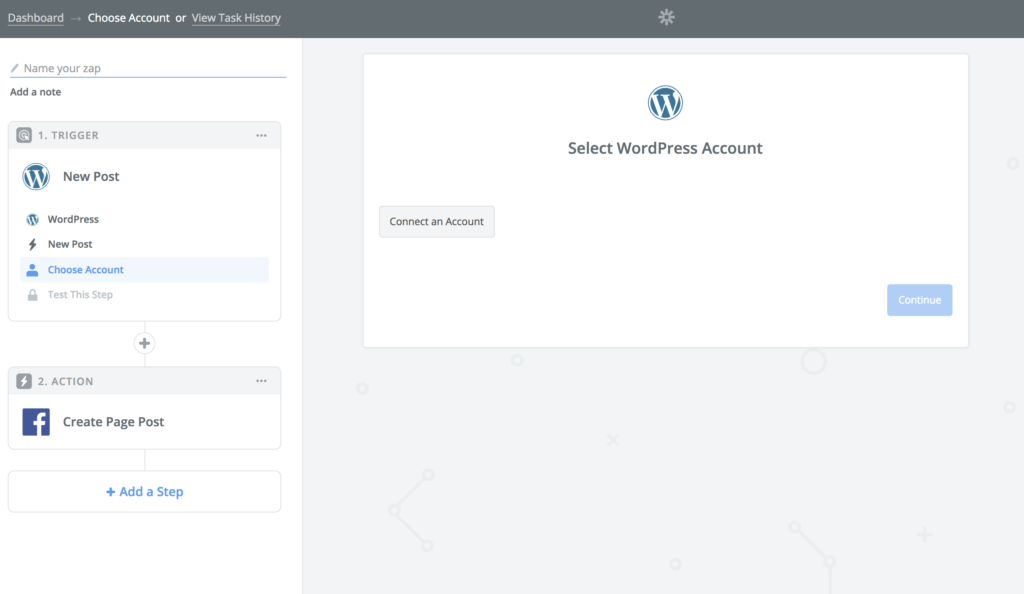
Type in a name for your Zap in the top left field. Something like “WordPress to Facebook” will do.
Then click “Connect an Account” in the center of the screen. A new window will open, and you’ll be asked to enter the information about your WordPress account. You’ll need your website url and your username and password. For the URL section, I find it helpful to open my website in a new tab. Then click in the address bar so that everything is highlighted, and copy that. Then I paste into the field. This way I get the exact URL without having to type the whole HTTP mess.

Once your WordPress account is connected, you’ll be asked to set the parameters for the Zap. For this example, choose Post Status “Published” and Post Type “Posts”. You’ll see that there are lots of other options here, and hopefully those are giving you some ideas for other ways you could use Zapier.
Click “Continue”. Now Zapier will check your website for recent posts that they can use as an example. If you have posts on your website, you should get samples “New Post A” “New Post B” and “New Post C”. It really doesn’t matter which you choose, this is just sample information for Zapier to use to show you how your Zap will work.
Step 4: Connect Your Facebook Account
Now we’re going to do basically the same thing for your Facebook account.
First, choose the app that you want to be triggered. You should have the option of Facebook Pages or WordPress. Choose Facebook Pages. Now you’ll select what you want to have happen, which is Create Page Post.
Now you’ll connect your Facebook Account. You’ll want to enter the information that you use to access your Facebook Page. This will likely be your personal Facebook login information, because Pages don’t have their own login information. Don’t worry, this only connects Pages, and it won’t post to your personal account. (Unless you tell it to). But you’ll need to allow Zapier to access your information.
Step 5: Tell Zapier what to put in the post
Now, Zapier is going to pull in information from the sample post that we chose, and we’ll use that data to tell it what should be in the Facebook post.
Below you can see the first two steps. I chose which Facebook Page I want the post to go on (I’m administrator of a few). I chose the MACD page.
Then, I select the information that I want to be in the Facebook message. This is the text that goes in the post. For this example, I want the message to be the same as the title of my WordPress post. The sample that I have here is our most recent post, August 2018 Minutes. As you can see, there are a lot of options available to select, and I can put multiple data points in the message. I can also type in text.
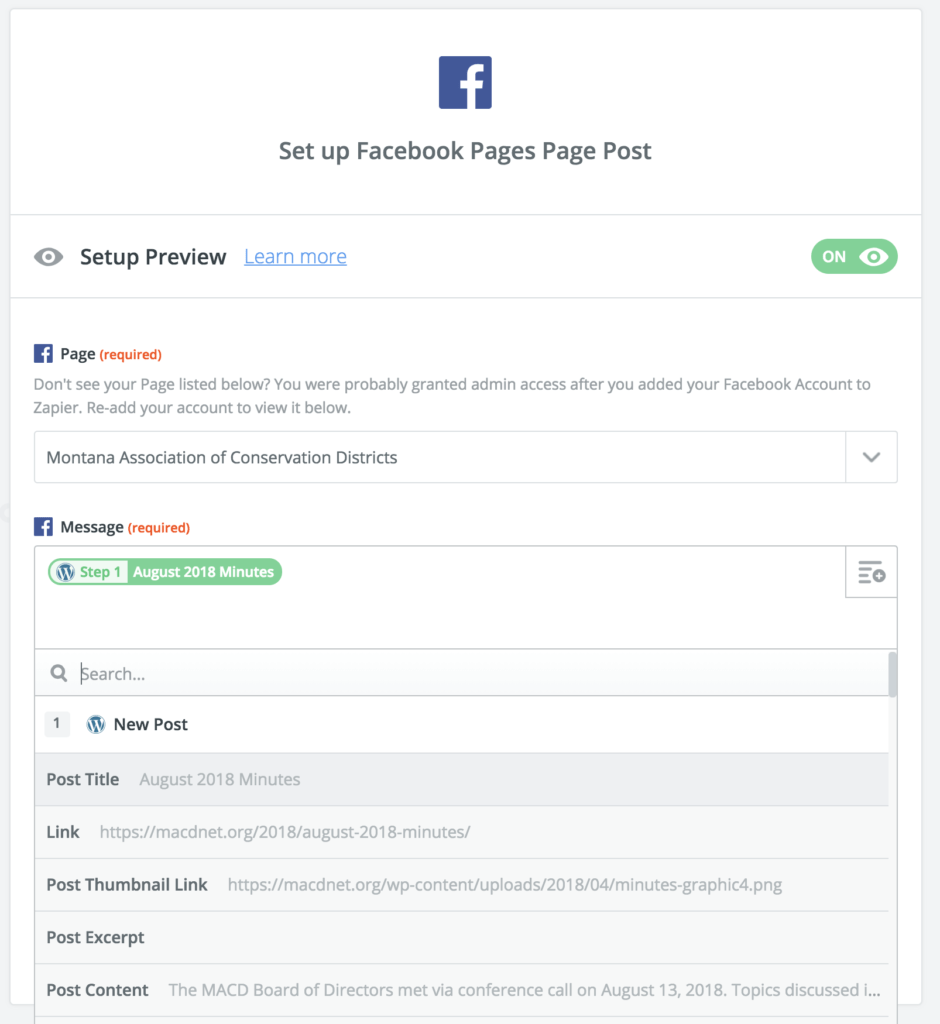
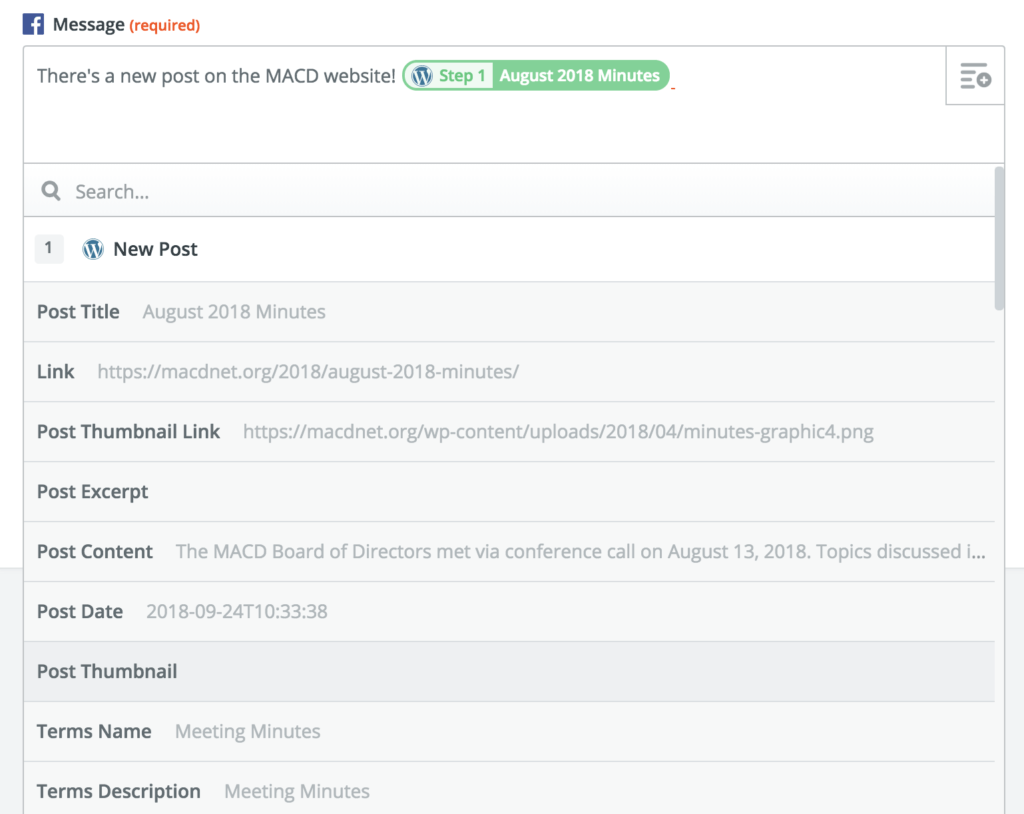
In this example, I just selected the Post Title. Below, I added some text to give the message context.

In the optional Link URL field, you’ll want to add the link to your post. This way the Facebook Post links back to the post on your website. If you’ve ever put a link in a Facebook status, you know that Facebook will also pull in a link preview with an image and more.
Here’s how mine looks:

Step 6: Test the Zap
Once you’ve gotten everything set up, you’ll be given the opportunity to test your Zap to see how it looks. Here’s how my post turned out on Facebook:
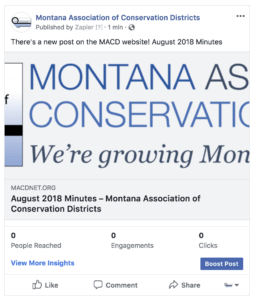
I’m not stoked about the image it chose for my post. Luckily, on my WordPress site I have a nice placeholder image that says “Meeting Minutes” on a blue background. So, I’m going to go back to my Zap and edit the template for my post. In my message section, I’m going to add my Post Thumbnail, so that Zap will grab the right image for my post. This will be the image that you put in the Featured Image section of your WordPress post.
Like this. Now I tested the step again, and here’s how the post looks:
Ah yes, that’s much better!
Step 7: Turn on your Zap, sit back and relax
Once you’re happy with how your post is set up, click Finish. Then turn your Zap on!
Now, whenever you post a new post on your WordPress site, it will automatically be posted on your Facebook Page as well, without you lifting a finger!
If you’re ever unsatisfied with how your posts are looking, you can log in to Zapier and edit your Zap. Or you can pause it.
I love Zapier, and there are lots of different ways to put the internet to work for you! Have fun exploring the automation universe! For those interested, IFTTT (If This Then That) is another great service that does the same thing.